"Dedicated to the preservation and enjoyment of skiing with wooden skis"
Traditional Birch Ski Makingby Greg Fangel 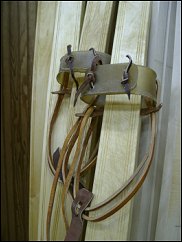
I started skiing with wooden skis, over 30 years ago. Pine tar, bamboo poles, a wine skin, and wool sweaters, socks and knickers were necessities of the sport back then. Cross-country skiing is a simple, reflective way to connect with nature in the winter. Kicking and gliding through soft snow in the quiet woods with cold snowflakes melting on my face and a biting north wind challenging my warm body, make skiing special to me. In the 1960's and 70's the Foxfire book series, Mother Earth News and health food co-ops were born. Today we have the North House Folk School in Grand Marais,MN an experience that thrusts students into the past, when simple tools, methods and 'down home' remedies were the norm. I decided to take the Traditional Birch Ski Making course at North
House, as a gift to myself, to experience what it was like in simpler
times. I enjoy woodworking and skiing, so it was a perfect fit for me.
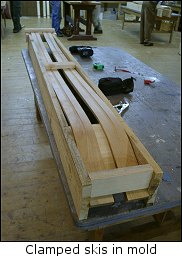
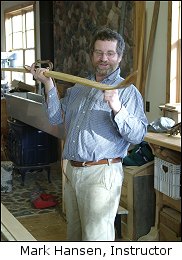
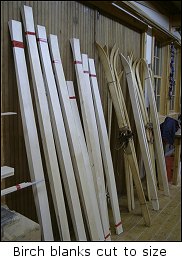
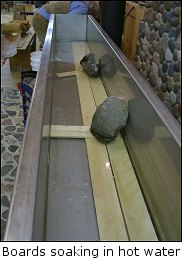
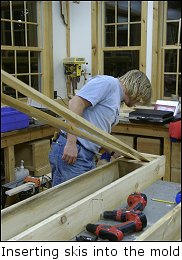
Mark Hansen, the gregarious ski-making instructor from Grand Marais greeted the students, after they had driven from as far away as Indiana. Mark's joyous, happy demeanor is contagious and it's obvious that he enjoys what he does at the school. Since this course was only 2 ˝ days long, Mark pre-cut the birch stock to a rough size for our skis. We promptly took our ski blanks and inserted them into a hot water bath, heated by the Jřtul wood stove in the old U.S. Forest Service building that serves as North House's woodshop. While the skis were getting warmed up in the water bath, we adjusted our ski molds to prepare to bend the skis into shape, including the camber below the foot portion of the ski. The bent ski blanks were left to set over night and the following
morning, we released them from the molds. After more instructions from
Hansen, we cut, gouged, scraped and chiseled the bent ski blanks into
something that resembled a pointed ski. While we were creating sawdust
and wood shavings, one of the students named John from Decorah, Iowa
described a wooden ski making class that he took in that town. In his
class, they used axes, planes and drawknives to shape their skis. In
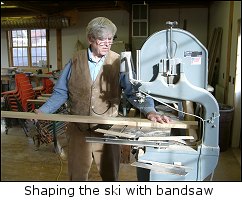
spite of my desire to re-live the past, I was happy to be able to use
a band saw to shape our skis.
The third and final day of the course was the time for final
finishing of the skis and installing the bindings. Last minute sanding
and cutting decorative patterns were normal routines for the home stretch
of the class. Once the final woodworking was done, it was time for the
inevitable Pine Tar. Pine Tar? Most people that skied in the 60's and
70's know what I am talking about. Ah, that wonderful aroma of pine
tar! Finnish people like the smell so much that you can buy Pine Tar
soap and candles in Finland. Pine tar on the skis is used to seal the
bottom of the ski to prevent moisture from entering the wood. Ski wax
is then put over the tar. The final step of this ski making class was to make and install the bindings. Most of us chose to install traditional Norwegian leather strap bindings. We sized the bindings to our ski-specific footwear; in my case a beautiful pair of Stegar mukluks. We soaked, cut and punched the rawhide strap for the foot, then sized, cut and installed the tanned leather straps to hold the boot onto the ski. Making skis from scratch and from natural materials seems so simple and holistic. Even though I also have the hi-tech, fiberglass, composite racing cross-country skis, I enjoy the other extreme end of the spectrum; wooden skis and bamboo poles. I can't wait to break some trail in the freshly fallen snow on my Norwegian traditional birch skis. |
|
|
Contact us at: greg [at] woodenskis.com
 Lindsey, a full-time perennial flower farmer from Iowa, decided to carve
a fancy figurehead on the tip of his skis. Personal, individual touches
were added to all skis that were made during our class. In addition
to fancy tips and tails, we created decorative lines and shapes on the
top of the skis.
Lindsey, a full-time perennial flower farmer from Iowa, decided to carve
a fancy figurehead on the tip of his skis. Personal, individual touches
were added to all skis that were made during our class. In addition
to fancy tips and tails, we created decorative lines and shapes on the
top of the skis.